Showing posts with label tips. Show all posts

Wednesday, April 2, 2014

Peg People Saints: A Tutorial of Sorts! Part One

I am so excited that I have actually been able to put together a bit of a tutorial on how to make the peg people saints that we use for B's seasonal table! The following will include how to make a basic saint peg doll. Extras like wings, turbans, after-thought-arms and miters will have come later. But I think this should be enough to get you started. While I will show pictures of the saints we use as examples, this tutorial will be more general. The details I will leave up to you!

Supplies:

  • Peg People: Here is one place to get peg people; they seem to have a lot of variety. I have always used peg people from the nearest craft store. In this tutorial all sizes are for the 2 and 3/8 inch size doll.
  • Felt: I use a wool rayon blend of felt that I got years ago at Joanne Fabrics. I haven't seen it there in a long time. You could, of course, use their polyester felt. It is inexpensive and it comes in a lot of colors, but I feel it has a shine to it that doesn't go well with the "natural" feel of the seasonal table. 
A similar product to what I use can be found at Felt The Love on Etsy.

If you want to use 100% wool felt you can find it here at Crafty Wool Felt also on Etsy. (She also sells peg people and matching thread!) Or here at Felt On The Fly also on Etsy.
(I am not affiliated with any of these sellers, nor have I used their products, nor done business with them; I found them all with a quick search on Etsy.)
  • Glue: I use Aleene's Tacky Glue.
  • Embroidery thread or yarn for hair. 
  • Scissors, needle, thread, measuring tape, pins.

And now, on to the Saints!

Saint John the Baptist is the simplest saint we have. (Ours actually does have his characteristic skinny cross. And since he does have that item, I didn't even feel the need to give him any arms!)
Note: pretty much every Catholic saint has certain characteristics with which they are depicted in paintings, drawings and statues. These help the viewer know which saint it is. For example, Saint Peter the Apostle is always shown with keys in his hand. I have almost never made saint dolls with their particular items. Mostly this is because I was making these saints quickly and simply after everyone else was in bed. Also some of these items are kind of complicated to recreate in felt. But I think it would be really cool to try to include these symbols someday. Good on you if you figure out how! : )

Basic Garment: cut a rectangle of felt about 2 and 3/4inches wide by 1 and 1/2inches tall. This is the most basic garment, and most saints have this layer even when they also wear a cloak or robe. Because not all peg people are identical, please cut your rectangle according to your own doll. It should be tall enough to stand up above the shoulder of your peg person about 1/8 of an inch so it can be gathered together at the neck like you see on St. John above.


To apply this garment you can either glue it around your peg person (this is the fastest way to do it), or . . .


 . . . you can sew it on. There is no real reason to do this unless you like the look of the seam. Either way, make sure the bottom edge of the felt is flush with the bottom of the peg doll so he will stand up steadily.


Then sew a running stitch around the neck edge of the garment about 1/16th of an inch from the edge, pull this seam tight so that the felt gathers against the peg doll's neck. Knot and cut the thread.


You can now decorate your peg doll with belts, sashes, vests, ribbon,and capes.

Red Hat King, to the left, has a fancy ribbon glued around the bottom of his body. Purple Hat King, in the middle, has a vest made of a little, rectangular strip of blue felt glued around his body. The corners of the blue felt were trimmed to create a v-neck. Yellow Hat King has a yellow belt that is hard to see under his cape. The capes are all rectangles of felt, of various dimensions, glued at the neck of the peg dolls.
Our fellow from above became a deacon, so he got a sash that goes over his shoulder and crosses at the opposite hip. I find, in most cases, it is easier and more precise to put the glue on the accessory, and then place the accessory on the peg doll, rather than put the glue on the peg doll.


Cloak or Robe: I will start with the hooded cloak that I have used for almost all my female saints. This is the least precise and most artistic garment. I think the finished piece falls somewhere between soft sculpture and toy. One of the reasons I like to dress my peg dolls in felt rather than paint them is because I like the organic way these robes and cloaks drape. I never know when I start how each one will end up. I think this gives each doll a living, dynamic look. The whole style is based on Waldorf table puppets. Here is an example of table puppets that I made years and years ago. 

The table puppets are usually about 8 inches tall. They are used in Waldorf kindergartens to retell fairy tales and other stories. The goal is to present lovely, gentle, dynamic images of the stories which do not impose themselves on the child's imagination.


My peg people are direct descendents of the table puppets, so to speak. Because of the organic nature of these dolls' construction I don't have a lot of exact measurements, or detailed patterns. But I will walk you through what I do, giving measurements along the way. I don't think it is super complicated, and I hope that you will find joy in allowing your doll to emerge organically!

From left to right: St. Ann, St. Patrick, St. Mary, (Little St. Mary), St. Brigid, St. Joseph, St. Joachim. (Sts. Ann, Mary and Brigid have the basic hooded cloak.)
For the basic hooded cloak you will be cutting out an approximate half circle. The piece is about 5 and 1/2 inches along the straight edge. This is the edge that frames the face. From the middle of the straight edge to the middle of the curved edge is about 3 and 1/4 inches.


Again, please measure according to your own doll as not all dolls are identical. I usually find a corner of the felt and use that as my starting point. Measure from the corner of the felt up and over the top of your doll's head. Let the felt go past the doll's base 1/4 of an inch or so on each side to give yourself some leeway for sculpting it later on. Cut a notch in the edge of the fabric to mark where the fabric hit the base of the doll.


Now to measure the length of the cloak in the back. Place the doll on the fabric and fold the straight edge up over the head to frame the face. The straight edge should lie right on the forehead of the doll. Place a pin to mark the base of the doll.


Now fold the felt so that the corner meets your notch.


Cut a generous curve, through both layers, from the corner to the pin.


There is your semi-circular cloak!


Next I put glue on the peg doll; a stripe from ear to ear like a headband and a stripe from the headband down the back of the head to the nape of the neck.


Then I lay the cloak over the head, straight edge in front, and press it into the glue and hold it there until it holds itself.


Next, I put a line of glue along the inner edge of what is now the front of the cloak, and press it down to the body of the doll. This gives the cloak some stability when it comes time to sculpt it. Let all the glue dry completely.


Trim any excess fabric around the base so the doll stands evenly.


Each of these saints was sculpted a little differently. I sculpted Sts. Mary and Ann using mostly glue. Mary has a few stitches here and there. St. Brigid, on the other hand, was sculpted entirely with needle and thread. In either case, I usually just push and pull the cloak around until I like the way it looks. I try to pay attention to where the cloak meets the body or where it meets itself. When I have found an arrangement that I like, I fasten it down with a dot of glue on the inside of the cloak or a few stitches. I'll just point out a few features as starting points.

From left to right; St. Mary, St. Ann, St. Brigid

St. Mary ended up being very symmetrical. You can see in this photo from the bottom, how the folds of her cloak are almost identical on both sides. This is very different from St. Ann, in the next photo. St. Ann's cloak has a lot of flow to it. While St. Mary's cloak is glued down almost completely all the way around, St. Ann's cloak is only glued in about four places.


St. Mary's arms stand out away from her body because she is able to hold baby Jesus that way.


I just fastened the tips of her cloak together with a few stitches.


I used a needle and thread to sculpt St. Brigid's cloak. I think I did this mostly because that is how the table puppets are made. It leaves more marks, so to speak, on the outside of the cloak than gluing does. This might be unappealing because the stitches are hard to hide and might look messy, but I think it allows for more precise shaping.


I stitched down the folds around her head and neck, and all along under her arms. I don't remember if I stuffed her arms with anything, but sometimes it helps create a more real look if you fill the "sleeves" of the cloak. You can use stuffing or little bits of left over felt.


And one more thought about St. Ann; I like the way her arm stands out away from her body. I did this because one of the only ways a viewer knows that St. Ann is St. Ann in iconography is that she is always accompanied by a young St. Mary. With her arm out like that, little St. Mary always has a nice place to nestle. To form her arm that way, I adjusted the way the front of her cloak is glued down. So, instead of gluing it straight down like in the burgundy example doll above I glued it further up and further back.


For the Robe: I cut a shape like this:


I have never had a pattern, so you'll have to measure according to your own peg doll. The long straight bottom edge is the bottom edge of the robe. The middle of the upper curve sits at the back of the peg doll's neck. The two horn like points are drawn up and over the doll's shoulders and become the front edges of the robe. I usually glue them down like I glue down the front of the cloak. Then I gather, and pull, and tack down with glue or thread all the folds, until I like the look.


Hat: The little shepherd hat is a circle of felt about 1 and 3/4 inches diameter. I stitch a running stitch 1/4 of an inch from the edge and pull it just tight enough to fit the head of the doll. I glue it down with out any hair underneath. I think that is a lot to chew on! Of course there is more, and I look forward to posting about priests, hair, and accessories!

Friday, March 14, 2014

Tips for Starting a Seasonal Table


A friend of mind recently asked me if I had any tips for starting a seasonal table. I thought I would share some examples of simple seasonal tables and give some idea of where I started. I hope these ideas will be helpful! [So, this got kind of long! If you are just interested in some tips you can skip down to the ***** section! : p)

I greatly admire the seasonal table tradition that comes out of the Waldorf school movement. Because the Waldorf early childhood curriculum is based entirely on the seasons, early childhood classrooms have "nature tables" to help reflect the outside seasons indoors. There are a few things that Waldorf nature tables have in common, in my experience.
  • First, they are spaces that are set apart. They have a designated shelf, or table top, or bureau where the nature table always is. It doesn't move around the room, or get placed higglety pigglety, or thrown to the side when that shelf is needed. In this way, the nature table is a little bit alter like. It's not an alter, no one worships there, but there is something reverent about its placement.
  •  Second, while it varies from classroom to classroom whether children are allowed to play with and touch the nature table, there are almost always rules that the objects on the table must stay there. So, even if a child is allowed to move things around and play there, the play must stay at the table. In many cases though, the nature table is just there to be "admired" and is not for play. 
  • Third, the decorations and objects found on the nature table are almost always made of natural material; silk, stone, wood, seed pods, wool, shells, cotton, flowers, etc.
  • Forth, there is usually some representation or personification of the season; a figure like "King Winter" in winter, "Prince Autumn" in the autumn, or the Holy Family during Advent and Christmas. 

While I have never seen any rules for how to put together a nature table, these four aspects have been present in pretty much every Waldorf nature table I have seen.

In a Waldorf school the idea is to bring, into the classroom, the mood of the season. Colored silks are used to create a landscape which mirrors the current season. Figures are there to personify the season, and objects from nature are used to enhance the effect. Seed pods or flowers remind us of what is going on in the gardens and fields. Branches become trees that house little felt birds or piles of silk snow.  King Winter spreads his white cloak over the ground, or Mother Earth's blanket covers the table with fallen leaves. There is sometimes space for children to lay the "treasures" they find on a walk, but the underlying display is a scene designed by the teacher. There is a certain amount of whimsy that comes in here because objects are used not only to represent accurately what we are seeing in nature, but also as props for the figures. Therefore, a large sea shell becomes a pond for little fish, or hollow logs become homes for gnomes. Again, all of this is meant to bring the mood of the season into the classroom. Its purpose is to hang as a background to the children's play, and only rarely does it get mentioned or actively sought out.

Waldorf schools are not the only ones who have nature tables, however. A quick look through Pinterest reveals that there is another style of nature table. Sometimes found in Montessori classrooms, or in home school rooms, these "natural history style" nature tables have the more concrete purpose of giving children a direct and focused exploration of nature as the foundation for science. (Examples can be found here, and here.) The natural history style nature table has the first three aspects from above, a designated space, rules about how it is to be used, and natural objects. There can be trays that help categorize the objects; feathers, shells, seeds, grasses, etc. There are sometimes books and field guides. There are sometimes microscopes and magnifying glasses. All of these facilitate the child's understanding of the objects of nature. All the objects and tools, neatly laid out on the natural history style nature table, are quite beautiful, and quite different than the Waldorf nature table.

I personally like the whimsical character of the Waldorf nature table, and the look of draping silks, so our table often looks very "Waldorfy". I also really like the role the figures play. I like personifying the forces of nature. (Perhaps it is the artist in me?) I like representing the spiritual realities of angels alongside the natural world. I like that a season (be it a week, a month, a yearly quarter) can take on the character of a person. For example St. Michael the Archangel, for me, characterizes the whole Autumn season, and so he is present on our nature table right alongside the apples, and squashes and fallen leaves. And right now, with small children, I think that the relationship between the human, the divine, and the natural is more important to display than the concrete, scientific name of those same fallen leaves. I hope that as my children get older we can incorporate more found objects into our nature tables. As it is right now, however, with a three year old who is only beginning to understand how to put things away, and a one year old who puts everything into her mouth, I have to carefully select and limit the number of natural found objects we bring into the house.

*****
All that theory aside,
  • I would start with a designated space.
  • I would decide if I want the children touching it, not touching, playing gently or what have you. 
  • I would get some cloths for the background/table cloth. Years ago I started with cotton cloths. I bought them in different seasonal colors. Some even had patterns to be leaves on the ground, running water etc. At the time I found silks to be hard to get and/or expensive. Now I get my silks from Dharma Trading Company. I dye them myself using fruits, vegetables and natural dyes. Lil Fish Studios is a blog that talks a lot about experimenting with dyes; it's a good blog to browse. Here is a beautiful post from Poppytalk about experimenting with food as dyes. Here is an article from Mother Earth News about mordanting your fiber (yarn or cloth) before dyeing it. (Mordanting helps make the color brighter and fade less over time.) If you are interested in a quick dye job, but don't want to spend tons of money or learn the whole art of dyeing, you can use Kool-Aid. I don't have any experience with this though, and I would guess that the colors end up being more neon and less natural unless you use several colors at once so they mute each other.
  • You can use things under your table cloth to add contours to your landscape. Small food boxes (well cleaned, of course!), rocks, small stumps (like those cut from the end of the Christmas tree), etc.
  • Now that the table is set it's time to set the scene! You can start bringing in items from outside, a small vase of flowers, small branches, interesting knots of wood, stones, crystals, leaves, bark, shells, etc.
  • And then come the figures, which require a whole post to themselves! Although, I will say that the quickest people are peg people, especially if you choose to paint them rather than dress them in cloth. You can find my tutorial for making peg dolls here.
  • And then, just realize that this is going to be a process. One silk, one figure, one pine cone at a time you will learn your own style, and you will learn which elements are important to you. Enjoy the journey!
  •  
*****
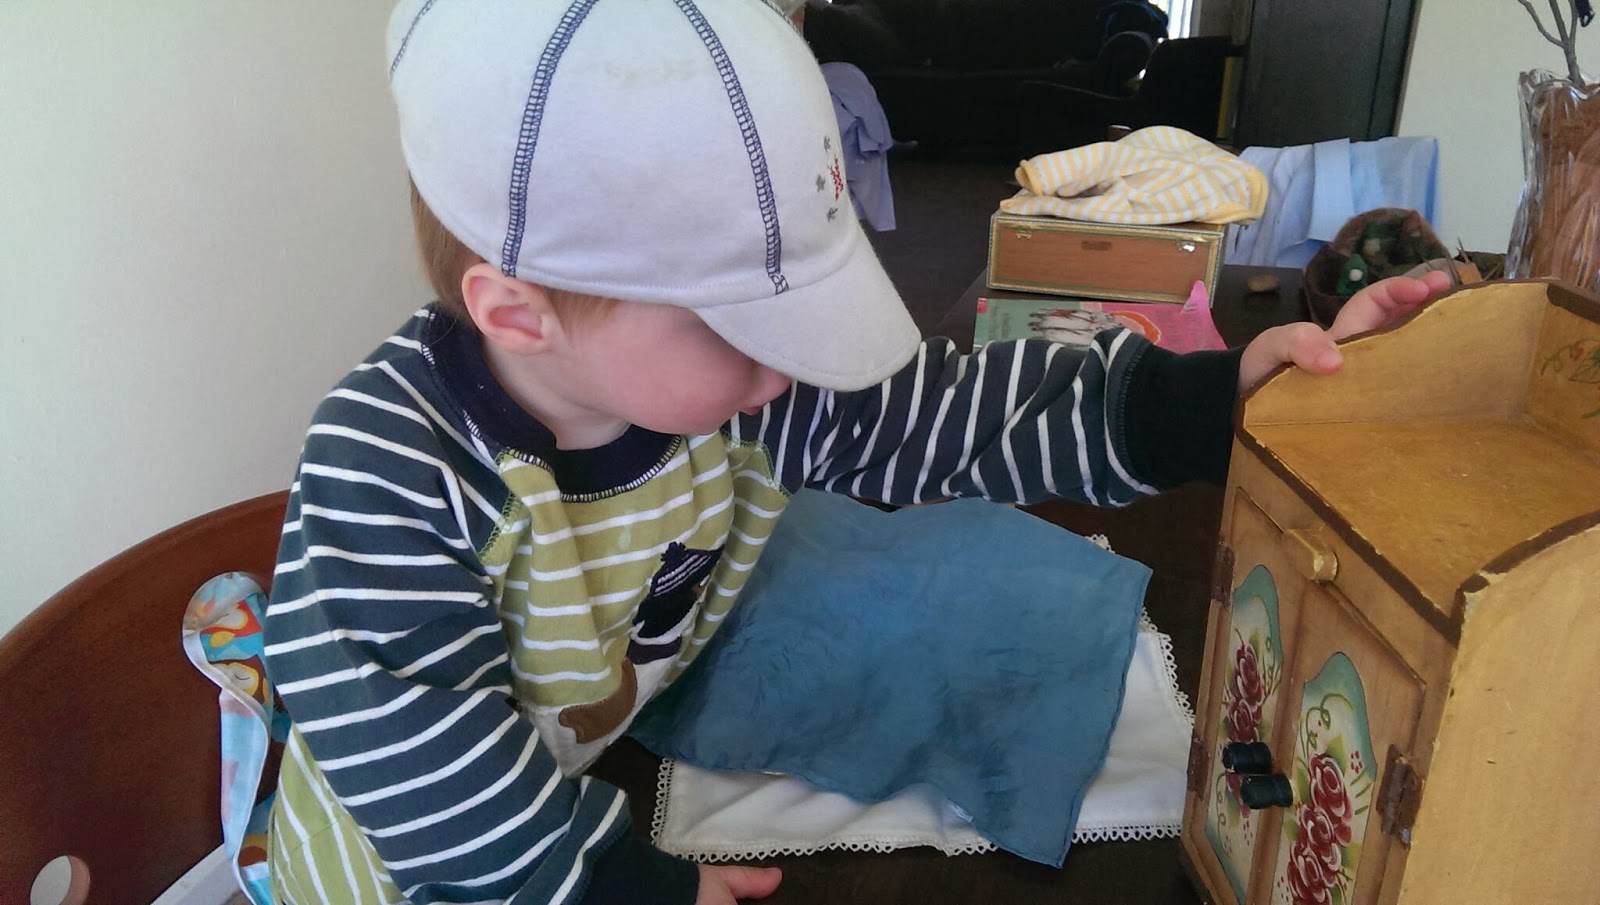
Here are two examples of very simple nature tables. The first is B's seasonal table. We found this sweet little chest at the thrift store. It sits in B's room, and is totally accessible to him. It often gets used for other purposes (as you will see!).


I made a little gnome to live in the lower portion with his crystal. I liked that the chest gave us the opportunity to have many layers of beings. Since gnomes are associated with the underground, I put him down below.


The saints peg people sit on top. The table cloth is a little folded silk handkerchief. In theory we could change the color to reflect the season, but we haven't really done that. The icon is always there.


B really prefers to use the chest as a tabernacle : ) I recently put the gnome away because B usually takes him out anyway, and he's right; the chalice and paten look right at home in there!


This next one was created by my friend and colleague Liz Hagerman for the parent and child classroom at Acorn Hill Waldorf Kindergarten and Nursery. So simple and so beautiful! (Note; this nature shelf hangs above the reach of the little children who use this classroom. So, not for playing with, but for admiring.)


A little shelf. The background hangs from the wall. A small vase and candle. Three felt stars.


And two wee babies! Perfect!


Wednesday, July 25, 2012

Stone Mat Tutorial

Welcome to my Stone Mat Tutorial! I was originally inspired by an article in the August 2008 issue of Martha Stewart Living. When I was pulling together my grounding kit, I looked there to see how to make one of these stone "spa mats", as she calls them. Unfortunately, the supplies she suggested were no longer available from the vendor she mentioned, and after a quick trip to the orange version of the big box home improvement store, it became clear that I would have had to buy an entire case of stone floor tiles in order to complete my craft. So I struck out on my own and acquired these supplies:

Tacky glue,
Real river pebbles meant for decoration (I found them in the floral and section at Michael's),
Cotton cross stitch fabric (15in x18in),
2.25 inch wide ribbon (or you could use twill tape).


A note of caution: since this tutorial calls for real river pebbles, it may be the case that some of the pebbles are found to be broken or sharp. If, as you are working, you find a sharp piece, please discard it, and use a smoother piece in its place.

Also, please make sure you read the instructions all they way through before beginning, because there is a variation at the end, which you might like to incorporate.

First, measure around the perimeter of the piece of cotton cross stitch fabric. You will see in my pictures that I chose to make two 15x9 inch mats by cutting the 15x18 piece in half, but you can also just use it as-is for a larger mat.

Cut a piece of ribbon the length of the perimeter of the fabric, plus about two inches to overlap.

Iron the ribbon in half lengthwise so it has a nice crease down the center. Make sure you use the correct temperature setting for the type of ribbon you are using so nothing melts!


Then, inserting the cross stitch fabric into the crease in the ribbon, pin the ribbon in place around the edge of the fabric. I don't know of any professional ways to go around corners, I just fiddled with it until I liked it. If you are happy with the way it looks, and it lays flat enough to sew with a sewing machine, you've done a good job!


When it came time to overlap the two ends of ribbon, I snipped the corners off so they wouldn't poke out after the end was folded over.


Fold the end over once . . .


 . . . and overlap the start of the ribbon. Pin.


Then, sew the ribbon in place, starting where the ribbons overlap. I guided the sewing foot along the inner edge of the ribbon, as shown in the picture.


This is a gratuitous shot of my beautiful mint green, vintage sewing machine which I got at a tag sale for $35. I always get annoyed (read, jealous) when people say, "I found this awesome vintage thing for $2 at a tag sale!!!!", because I don't ever seem to find awesome things with ridiculously little price tags, but this just proves: Random inexpensive vintage finds can happen to you!!


When you have finished sewing the ribbon, lay the mat out on a piece of parchment or wax paper. This is to keep the glue from sticking to the table.


Now, slather on the glue.


Really slather!


Using a piece of cardboard, smooth out the glops of glue into one even layer. It should be pretty thick.


And then begin to sprinkle the pebbles all over the mat. Sprinkle them thickly. As you go, press down on the pebbles so that they are really stuck into the glue in one layer. You will notice that most of the pebbles have one broader side. As you press down on them, try to maneuvers them so that the broadest side is down in the glue. If they didn't happen to fall broad side down, at least maneuver them so that they are resting on a side and not an edge.

After your mat is covered in pebbles, if need be, you can add single stones to any spots that appear bare.


Let your mat dry for over 24 hours, to make sure that they glue is dry. You will probably find that, either right away, or as you use your mat, some of the less well secured stones will come off. You can just replace them with a dab of glue, and your mat should be as good as new!


Variation: before slathering glue on the whole mat, you can form a neater border by gluing a row of stones around the perimeter of the mat, about 3/4 to 1 inch inside the outer edge. Then you would proceed to sprinkle stones as indicated above.


Then you can enjoy the massage!!